If you’re using VS Code to create Manim animations then you can set your output quality to 4k in 3 different ways.
Method 1: use the Manim CFG file to set the default output quality to 4k
The first way and easiest for me is to create a Manim config file that will let you set your default output quality:
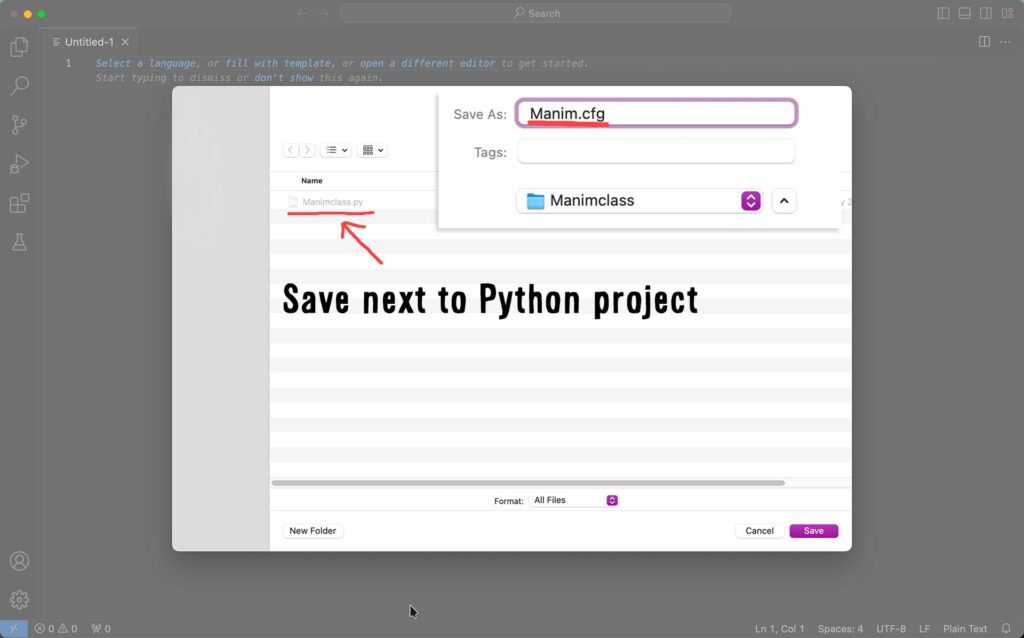
1. Open VS Code
2. Click Ctrl + N or Command + N on Mac to create a new file
3. Click Ctrl + S or Command + S to save that file
4. Name the file “Manim.cfg”
5. Save it in the location where your Manim python file is (the one that you use to write Python code and create animations)
6. Open Manim.cfg file and type:
[CLI]
quality = fourk_quality
7. Save the Manim.cfg file with Ctrl + S or Command + S on Mac.
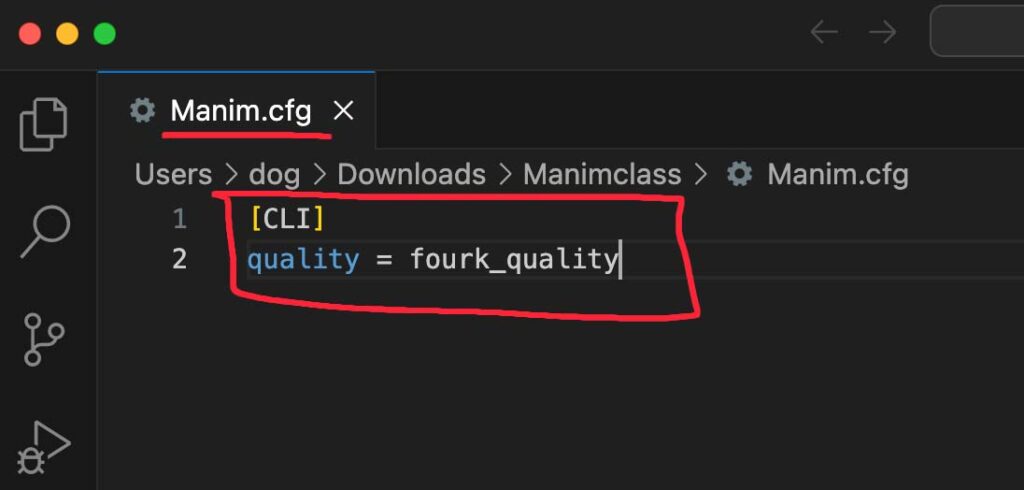
The next time you render any Manim scene inside of VS Code the output will be 4k quality.
Here are other output quality settings that you can set inside the Manim CFG file:
- 4k (3840×2160) (60 fps) – fourk_quality
- 1440p (2560 × 1440)( 60 fps) – production_quality
- 1080p (1920×1080) (60 fps) – high_quality
- 720p (1280 × 720) (30 fps) – medium_quality
- 480p (854 × 480) (15 fps) – low_quality
Also, if you create another Python file for Manim animations, in a different location you can create a new Manim.cfg file in that location to affect all your new Manim scenes created through that new Python file.
Method 2: use the Manim Sideview extension to set Manim output quality to 4k
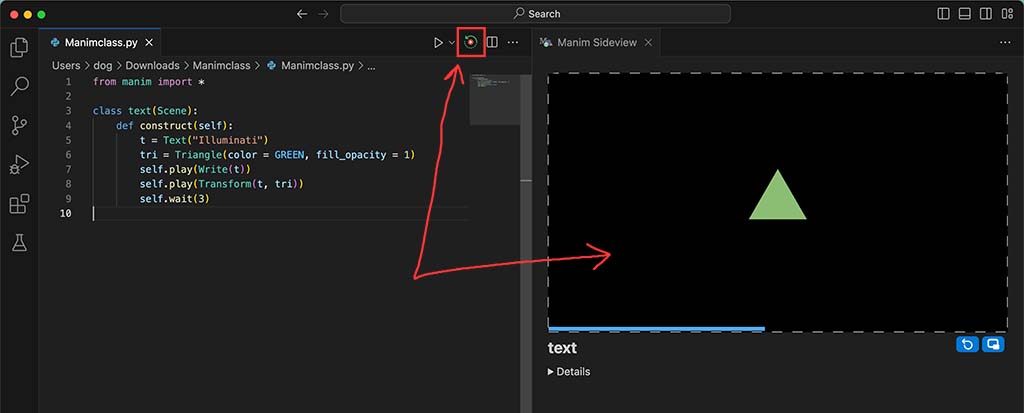
Manim Sideview is a VS Code extension that lets you preview your Manim animations inside of VS Code.
You can install it by going to extensions, looking for Manim Sideview, and clicking install.

Now every time that you code an animation you can click on the Manim Sideview icon and it will play that animation inside of VS Code.
So if you use this extension you can go into its settings and input a command line argument to set the output quality for 4k.
1. Go into VS Code settings and search for “Manim”. You should see “Manim-sideview: Command Line Args”.
2. Type -qk into the Command Line Args field.
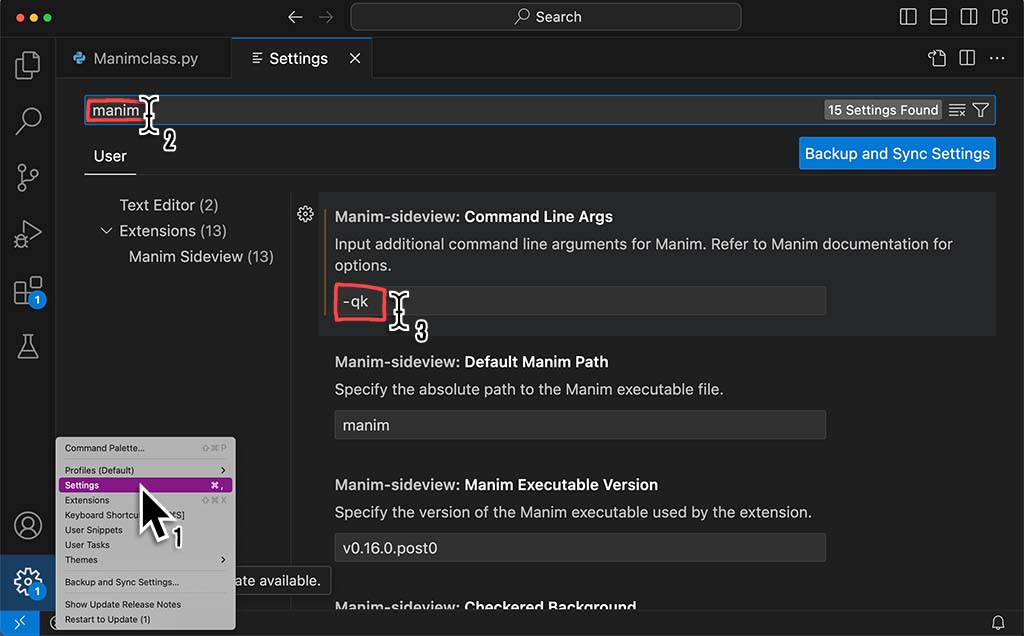
3. Run your animation code and then play it with Manim Sideview. It will export that scene in 4k quality.
Method 3: use the Terminal to export your current Manim scene in 4k
Alternatively, you can use the Terminal inside of VS Code to render Manim animations in 4k.
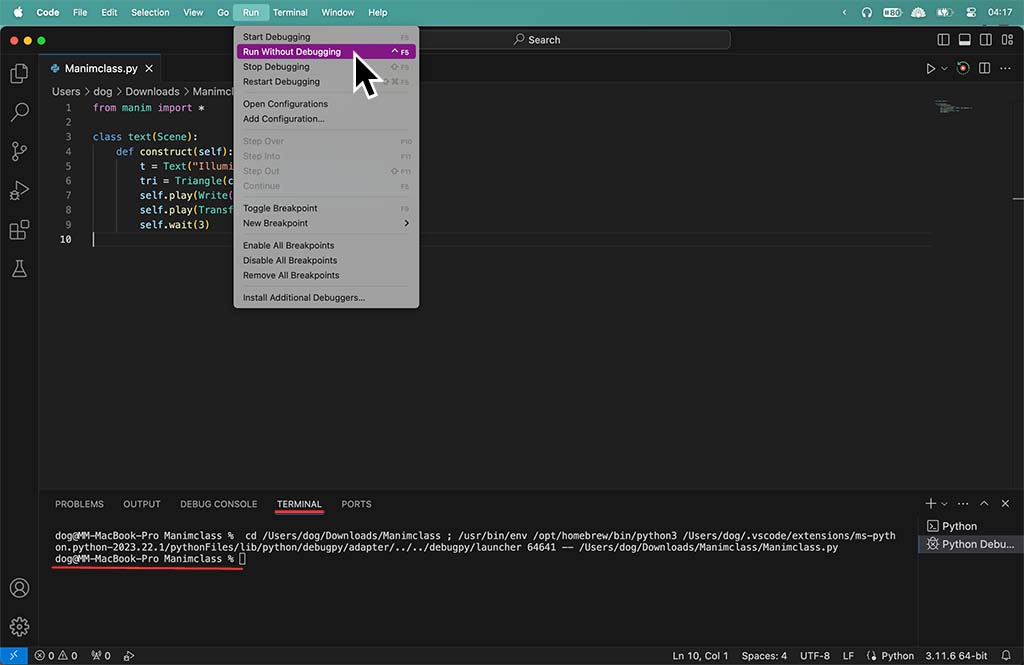
1. Go up to Run -> and click Run Without Debugging. This will open up the Terminal window at the bottom of your VS Code panel and it will take you directly to your Manim file’s location through the Terminal so that you don’t have to navigate there yourself.
2. Specify the output quality like this:
manim [FLAGS] [PROJECT] [SCENE]
So to output 4k quality it would look like this:
manim -pq [project_name.py] [scene_name]
Without brackets of course.
The letter p in front of qk just tells Manim to open the video in the default media player once it renders it.
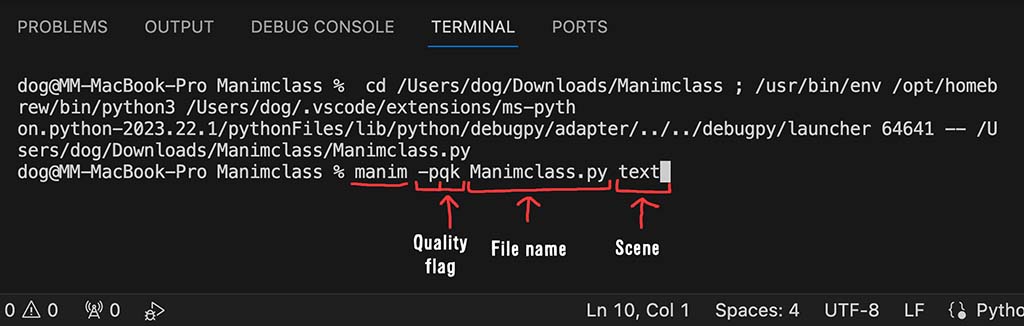
Example:
Here my Python file that I use to write code for Manim animations is called “Manimcalss.py” and the scene name is called “text”. I can export this scene in 4k quality like so:
manim -pqk Manimclass.py textHere are all the CLI flags that you can use to export Manim videos in different quality:
- -ql – low quality (854 × 480) (15 fps)
- -qm – medium quality( 1280 × 720) (30 fps)
- -qh – high quality (1920×1080) (60 fps)
- -qp – production quality (2560 × 1440) (60 fps)
- -qk – 4k quality (3840×2160) (60 fps)
Let me help you learn Manim
If you want to skip the headache of trying to learn Manim from a bunch of scattered information, I put together a comprehensive 3-hour Manim course for complete beginners.
It will give you all the foundational skills you need to start creating stunning animations with code.
Enroll In Manim Course For Beginners